
A standing seam roof is one of the few exterior products where the finished look depends almost entirely on decisions made before the first panel goes down. The panels are visible. The measuring, the trim, the fastening and the flashing that make the roof shed water are not. That gap between what homeowners see and what actually keeps a roof dry is where most installation problems begin.
Manufacturer literature on these systems is direct about one point: installing a metal roofing system is a skilled craft that requires considerable trade knowledge and experience. That sentence appears in architectural standing seam install guides for a reason. What follows walks through the work in the order it happens, so you can evaluate a bid, ask better questions, and recognize a job that is being rushed.
What makes standing seam different from other metal roofs
Standing seam panels connect along raised ribs, and the panels interlock along those seams. The result is a roof surface with very few penetrations and a straight, architectural line from eave to ridge.
Many systems use a concealed fastener design. Snap Lock panels with a 1 1/2 inch rib, for example, are documented in manufacturer instructions as a hidden fastener system. The fasteners holding the panels down are covered by the seam rather than driven through the face of the metal, which is the main structural difference between standing seam and exposed fastener metal roofing panels.
Both approaches appear in technical installation guides that cover panels and trim end to end. They are not interchangeable, and the fastening method changes the decking, the underlayment and the trim details around it.
Why this is not a homeowner DIY project
Search for standing seam installation and you will find full video series covering trim and flashings from start to finish, plus DIY tutorials explaining how the panels interlock. The information exists. That does not make the work simple.
Panels are long, unforgiving and difficult to handle without creasing. A panel cut or bent badly is scrap, not something you can hide with paint. Layout errors show up as wavy eave lines or seams that wander instead of running true. And manufacturers are candid that detail work on metal roofing has to be done correctly for the installation to be warranted. A homeowner who installs the roof themselves may save labor and lose the warranty, which is a poor trade on a product built to last decades.
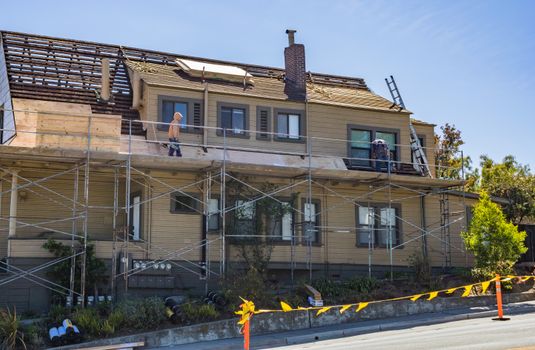
The installation sequence, step by step
Every crew has its own rhythm, but the order of work on a standing seam roof follows a predictable path. Knowing it helps you tell whether an installer is working properly or improvising.
Trim goes on before panels
Drip edge is installed along the eaves and rake trim is installed on gable ends before any panel is set. This step defines the edges of the roof, and it has to be right the first time because panels will cover it. Trim installed loosely or out of alignment will show along the whole eave line.
The first panel sets the whole roof
The first piece is measured and positioned, then a guide line is snapped to make sure the panel is square with the eave. This single step determines whether the last panel at the far end of the roof runs parallel to the edge or drifts. A crew that skips the guide line or eyeballs the first panel is gambling with the appearance of the entire roof.
Panels are set and locked together
Once the first panel is square, the remaining panels are set in sequence and locked along the seams. The interlock is what makes the roof water resistant, so each seam needs to be fully engaged and consistent from eave to ridge. This is repetitive work, and repetitive work is where shortcuts happen on a rushed job.
Flashing and trim finish the details
Flashing around valleys, walls, chimneys and penetrations, plus ridge and closure details, come after the panel field is complete. Videos on standing seam installation spend most of their time here because these details decide whether water goes where it should. Manufacturer guidance emphasizes tips and tricks specific to each detail so the finished installation can be warranted.
What the panel manufacturer’s manual controls
Standing seam is a category, not a single product. Different profiles carry different requirements for the roof deck, the material under the panels, the clip and fastener layout, and the seam spacing that results from panel width. None of those are things a homeowner should guess at, and none of them should be decided by a contractor from memory.
The installation manual for the specific panel on your house is the authority on all of it. If your installer cannot name the panel manufacturer and model, or produce the installation instructions, treat that as a serious warning sign. Warranty coverage on metal roofing generally follows the manual. Deviate from it and the manufacturer has grounds to deny a claim years later when you need it most.

Questions to ask before you sign
- Which panel profile and manufacturer are you using, and can I see the installation manual?
- What is going under the panels, and why that product?
- How are seams and end laps being handled at this roof’s pitch and length?
- What is the fastener type and spacing, per the manufacturer’s instructions?
- Who handles the warranty if a seam or a flashing fails?
- Is there a written scope covering trim, flashing and disposal?
Ask the same questions of two or three contractors and the differences in their answers tell you a lot. A contractor who welcomes the questions and points to documentation is a different risk than one who is annoyed by them.
Installation is only as good as the crew
Metal roofing is not a material where the product rescues the labor. The same panel installed by two crews can produce a roof that performs for decades or one that leaks at the first wind driven rain. Manufacturer guides stress that installing a metal roofing system is a skilled craft requiring considerable trade knowledge and experience, and that guidance exists because details are where roofs fail.
In North Georgia, that means looking for a contractor with a track record on standing seam specifically, not just metal roofs in general and not just shingles. Ask for photos of completed standing seam work, including close ups of valleys and wall flashings. Ask how long the crew has been installing panels and whether the same people will be on your roof from tear off to final cleanup. Roofing companies with in house crews answer that without hesitation.
Get an inspection and a written scope before work begins. Walk the roof line with the contractor, ask where water currently goes and where it will go after the new roof, and confirm that flashing details are included rather than listed as extras. Division Kangaroof has served Cornelia, Gainesville and the surrounding North Georgia counties including Hall, Habersham and Rabun since 2008, and an honest inspection with no pressure is the starting point for every project.

Where homeowners get into trouble
Three failures show up again and again on metal roofs. The first is a layout that was never squared to the eave, which shows up as a roof that looks crooked from the street. The second is trim and flashing installed casually because nobody will see it, which turns into a leak at the first heavy storm. The third is installation outside the manufacturer’s instructions, which stays invisible until a warranty claim is denied.
All three are avoidable with a contractor who reads the manual, measures twice, and is willing to show you the details when the job is done.
Frequently Asked Questions
What goes under a standing seam metal roof?
The underlayment or slip sheet specified by the panel manufacturer’s installation instructions. Different profiles call for different products and attachment methods, so the answer depends on your panel rather than on a general rule of thumb. Ask your contractor to show you the manual’s requirement for your specific system and confirm the material on site before panels go down.
How do standing seam panels attach to the roof?
Most standing seam systems use concealed fasteners, with the fasteners covered by the raised seam rather than driven through the face of the panel. The exact clip and fastener schedule comes from the manufacturer’s installation manual. Exposed fastener metal panels work differently, which is one reason the two systems should never be priced as if they are the same product.
Do I need plywood under a standing seam metal roof?
Decking requirements are set by the panel manufacturer and vary by profile. Rather than assume, ask to see the requirement in writing for the panel being installed on your home, and confirm what your existing roof deck actually looks like once the old roofing is removed. That conversation belongs in the estimate, not in the middle of the job.
How far apart are the seams?
Seam spacing follows panel width, which varies by manufacturer and profile. Your contractor should be able to tell you the panel width being quoted and show you a sample so you can see the spacing before you commit. Spacing affects both the look of the finished roof and how panels are laid out around valleys and penetrations.
Can installation mistakes affect the warranty?
Yes. Manufacturer guidance is written so a correctly installed roof can be warranted, which means deviations from the manual give the manufacturer a reason to deny a claim. That is why documentation and a contractor willing to follow it matter as much as the panels themselves. Keep the manual and your contract together in one file.