Top 8 Peel and Stick Roof Underlayment Choices for 2023

Though many homeowners may not know anything about roof underlayment, it is a crucial part of every roofing system. The underlayment goes directly over the roof deck, providing a waterproof barrier between the rafters and the roofing material. If you are a homeowner who wants the best for your home, it’s important that you have the right roofing components, including a durable underlayment.

Over the last few years, underlayments have seen several developments, and now they have become even easier to install, thanks to a peel and stick, self-adhering backing.

In this blog post, we’ll introduce you to the top eight peel and stick roof underlayment choices for 2023.

#1 Titanium® PSU30 by Owens Corning

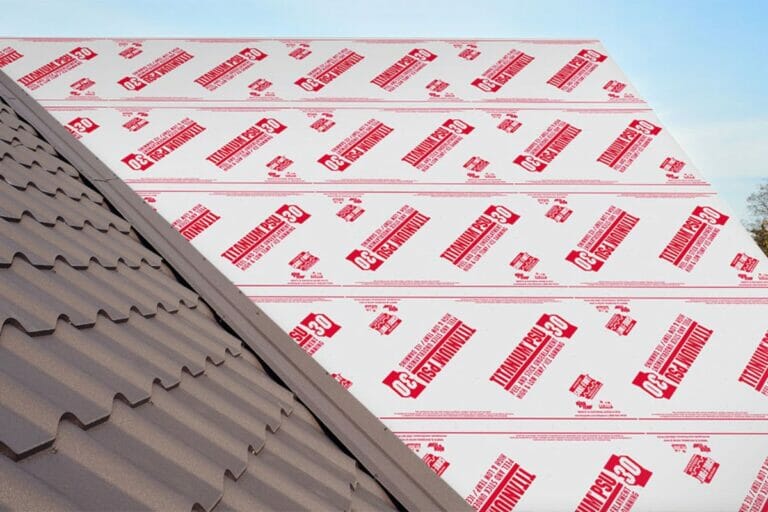
Homeowners seeking unparalleled roof protection should look no further than Titanium PSU30. This remarkable underlayment is a game-changer in roofing technology. Its distinctive feature is the patented Sure-Foot® walking surface, providing exceptional slip resistance on steep slopes, even in challenging conditions like rain or dust. What sets Titanium® PSU30 apart is its compatibility with various roofing shingles, including metal, tile, wood shake, and natural slate. It’s your shield against ice dams and wind-driven rain, making it ideal for roofs with slopes of 2:12 or greater.

Other features include its gray color and its granular-free design, which maintains a stable temperature during installation and helps the underlayment last longer, even in extreme temperatures. Plus, it comes with a lifetime limited warranty, giving homeowners peace of mind for years to come.

#2 WeatherWatch® Mineral-Surfaced Leak Barrier by GAF

When it comes to ensuring your home is shielded from the harshest elements, the GAF WeatherWatch Leak Barrier stands out as the go-to choice. This cutting-edge underlayment is engineered to provide homeowners with the utmost peace of mind. WeatherWatch incorporates advanced fiberglass reinforcement, guaranteeing resistance against wrinkling and buckling over time.

Installing WeatherWatch is a breeze, thanks to its adhesive properties. Even if adjustments are needed, it allows for one-time repositioning. Plus, this peel and stick underlayment not only meets, but surpasses ASTM D1970 standards, and comes with GAF’s limited lifetime warranty.

#3 StormGuard® Film Surfaced Leak-Barrier by GAF

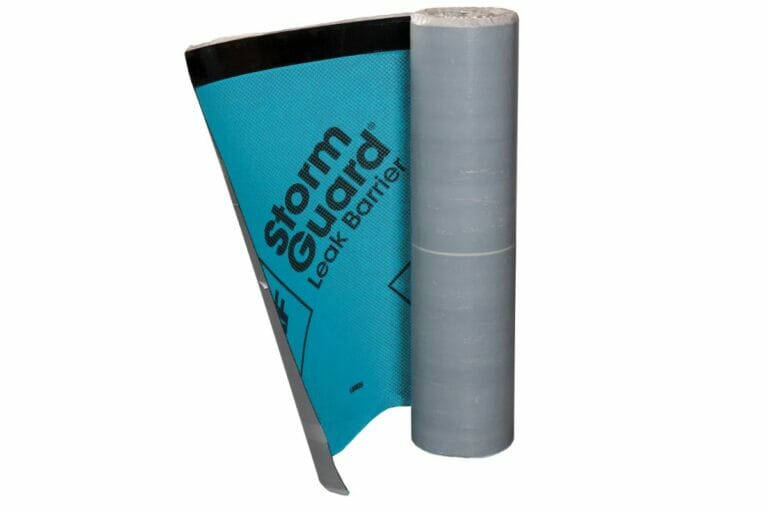
As a homeowner, you know the weather here in Georgia is usually pleasant but can take a turn for the worse. That’s why it’s important that you provide additional protection for your roof by installing GAF’s StormGuard® Film Surfaced Leak-Barrier.

This synthetic-surfaced peel and stick leak barrier is second to none. It excels in safeguarding the most vulnerable areas of your roof, including eaves, rakes, valleys, skylights, and chimneys. StormGuard goes above and beyond in preventing unsightly and expensive interior wall or ceiling stains, which can result from leaks caused by wind-driven rain, ice dams, and clogged gutters.

#4 Grace Ice And Water Shield®

GCP has been an industry leader when it comes to roofing underlayments; The company actually invented the fully adhered roofing underlayment.

When it comes to safeguarding your home against the harshest elements, Grace Ice and Water Shield emerges as the gold standard in fully adhered roof underlayments. Its latest peel and stick roof underlayment range is also popular among both homeowners and roofing contractors.

Coming to its features, the product is known for its robust adhesion to the roof deck, ensuring a watertight seal that fortifies your roof against even the most severe weather conditions. Also, its innovative ripcord release feature adds to its ease of installation. This makes waterproofing intricate areas, such as valleys, chimneys, and roof-to-wall transitions, a breeze.

#5 Wind & Water Seal™ by MFM

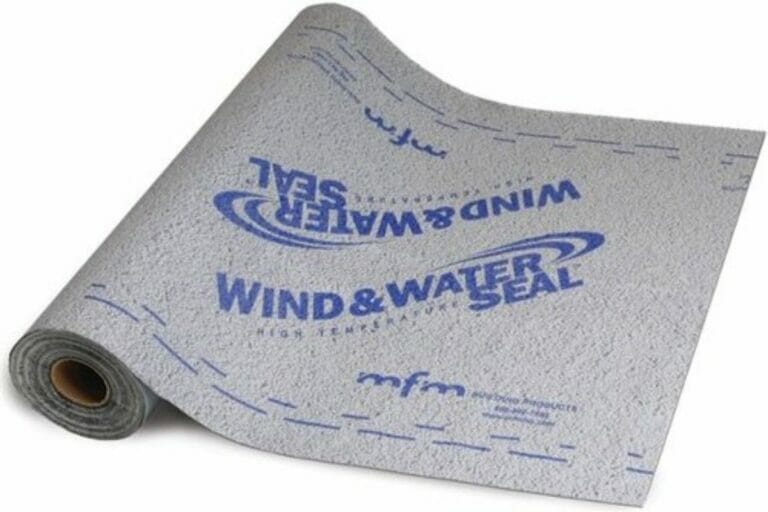
Meet the Wind & Water Seal by MFM, the roofing underlayment designed to take your roof’s protection to the next level. This robust 40 mil underlayment features a unique composition, consisting of a non-slip polymer film firmly laminated to a high-temperature rubberized asphalt adhesive. A split-release film safeguards the adhesive, ensuring it’s ready as the underlayment is installed.

Like most of the products we previously discussed, the Wind & Water Seal is also engineered for versatility suitable for use under all roofing materials, including metal, asphalt shingles, shake or concrete shingles, and clay tiles.

This is an ideal choice for high-temperature areas where durability is paramount, as you can leave it exposed for up to 60 days.

#6 Grace Ultra™ Butyl Underlayment

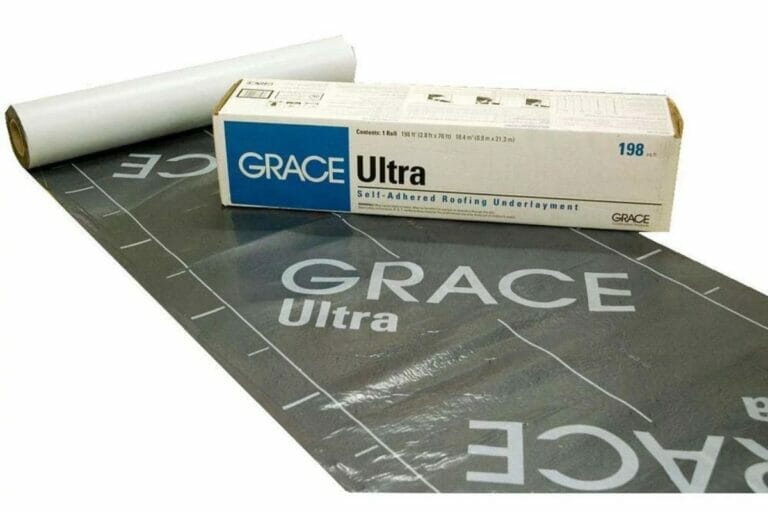
Our next roofing underlayment is also from GCP. While the Grace Ice and Water Shield we talked about earlier is quite popular and perfect for moderate weather conditions, Grace Ultra takes it a step further.

When it comes to safeguarding your roof against extreme temperatures and demanding conditions, Grace Ultra underlayment stands as the ultimate choice. This fully adhered, smooth surface roofing underlayment is tailor-made for high-temperature roof assemblies, setting a new standard for water protection.

Grace Ultra’s remarkable heat resistance, capable of withstanding temperatures up to 300°F, is unmatched. Its 100% butyl adhesive is ideal for elevated temperatures and is compatible with copper and zinc roofs, or any application demanding superior heat resistance.

#7 IB3 StormStopper™ by MFM

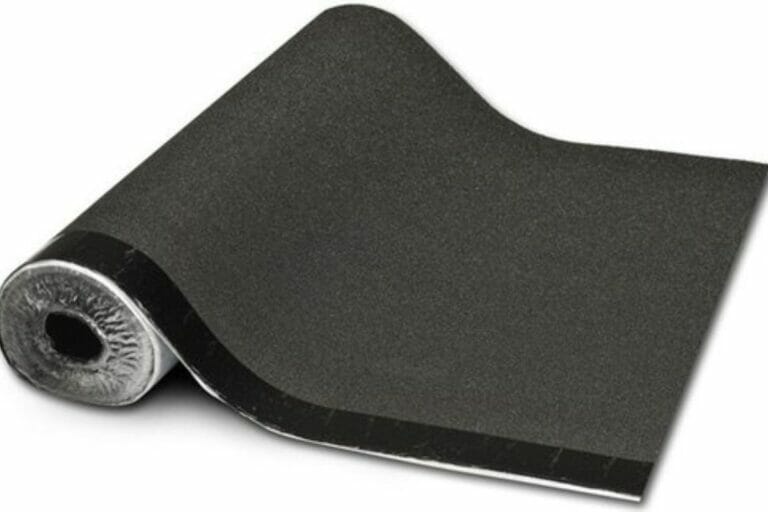
Our next product,  IB-3 StormStopper, is manufactured by MFM Building Products. This self-adhering, 50 mil underlayment is a true champion, designed to enhance the longevity of your roof, whether it’s shingles, tile, or any other material. Its construction features a layer of mesh firmly bonded to rubberized asphalt that is coated with black stone granules. What sets it apart is the non-removable selvage edge, ensuring a secure seal on overlaps for unmatched reliability.

This roof underlayment is designed to self-seal around fasteners, eliminating worries about potential leaks and providing added peace of mind.

This peel and stick underlayment is also available in another high-temperature variant. However, unlike the Wind & Water Seal underlayment we mentioned earlier, which comes with a 10-year warranty, the StormStopper underlayment comes with a 5-year warranty.

#8 PlyStik™ Plus by Epilay®

Our last, but certainly not least, top pick is the PlyStik Plus roofing underlayment.

With its substantial 48-mil thickness, this underlayment is engineered for exceptional durability and ease of use. Its unique design, coupled with outstanding tear strength and superior adhesion, makes it the ideal choice for contractors who need a roofing underlayment that’s not only reliable, but also manageable.

PlyStik Plus is available in convenient 2-square rolls, ensuring that it’s the perfect fit for a range of roofing projects. Its Class A fire rating provides peace of mind, making it suitable for areas where wildfires may be a concern.

The company also shows its commitment to the environment—as the product is 100% recyclable at the end of its lifespan.

Give Your Roof The Best Protection!

If your roof is showing signs of wear and tear, or if you’re considering a roof replacement, it’s time to put the knowledge from this guide into action. At Division Kangaroof, we’re not just here to provide information, we’re here to ensure your roof is in its best condition.

Our expert team is well-versed in offering top-notch roof replacement services, and we exclusively use the best underlayments to ensure your home remains safeguarded against the elements. Contact us today!

5 Signs It’s Time For A Skylight Replacement & Top Replacement Options

As an experienced roofer, I’ve seen my fair share of roofing issues over the years. One problem that often goes unnoticed, until it becomes a major headache, is a damaged or outdated skylight.

Skylights are a fantastic addition to any home, bringing in natural light and enhancing its overall aesthetic appeal. However, like any other part of your roofing system, skylights have a finite lifespan and can develop issues over time. In this comprehensive guide, we’ll explore the five crucial signs that indicate it’s time for a skylight replacement.

#1 Persistent Leaks

Leaky skylights are a common headache for homeowners. In fact, the skylight, along with the chimney, is one of the most susceptible spots for leaks on a roof. If the skylight boundary is not tightly sealed or if the flashing is not installed correctly, water can seep in around the edges. This becomes an even bigger problem during heavy rainfall.

If you notice water dripping or staining around your skylight, it’s a clear sign that something is wrong. Over time, even minor leaks can lead to significant water damage and mold growth in your home. It’s important that you do not ignore this issue, as it will only get worse over time.

What Causes Leaks?

  • Worn or damaged seals: Over the years, the seals around your skylight can degrade, allowing water to seep in.
  • Cracked or damaged glass: Any cracks in the glass can be a direct path for rainwater to enter.
  • Poor installation: If your skylight wasn’t installed correctly in the first place, it’s more prone to leaks.

#2 An Aging Skylight

Let’s start this point with an example of your roof. No matter what roofing material you install, there will come a time when it will no longer be able to protect your roof. The same goes for your skylights. They, too, have a lifespan and will eventually start deteriorating.

So, keep an eye out for signs of aging, and consider whether it might be time to consult with a professional about a skylight replacement.

#3 Drafty Skylights

Is your living space feeling chillier than usual during the winter months? A drafty skylight might be the culprit. As skylights age, they can lose their insulation properties, allowing cold air to seep in and warm air to escape. Lack of proper sealing around the skylight can also give rise to this problem. This not only makes your home less comfortable but also drives up your energy bills.

When it comes to your home’s comfort and energy efficiency, every detail matters. Drafty skylights can lead to temperature imbalances, making it harder to maintain a cozy indoor environment. During the scorching summer months, these same skylights can also allow heat into your home, forcing your cooling system to work overtime.

One effective solution to combat drafty skylights is to replace them with new, energy-efficient models. These modern skylights are designed with advanced insulation materials and improved sealing mechanisms.

#4 Outdated Design

Skylight technology has evolved by leaps and bounds in recent years, offering homeowners a plethora of modern features that can significantly enhance the quality of their homes. If your skylight is an older model, it might lack these innovative additions, making it the perfect candidate for an upgrade. Let’s delve deeper into the reasons why opting for a newer skylight design can be an investment in your home’s future.

The Advantages of Modern Skylights:

Remote-Controlled Blinds: Convenience at Your Fingertips

With a touch of a button, you can effortlessly adjust the light levels and privacy in your space. This feature is a game-changer for creating the perfect ambiance without leaving the comfort of your couch. Whether you’re looking to enjoy a sunny morning or seek some shade during the scorching afternoons, skylights with remote-controlled blinds give you complete control.


Rain Sensors: Protecting Your Interiors

As we have seen above, unpredictable rain is the last thing you want when you have a skylight, as it leaves your interior vulnerable. Modern skylights come equipped with rain sensors that automatically close the skylight the moment raindrops are detected. This feature ensures that you can enjoy the natural light without worrying about unexpected storms.

UV Protection: Safeguarding Your Belongings

The sun’s UV rays can wreak havoc on your furniture, floors, and belongings. Older skylights may not offer adequate protection against UV damage. However, modern skylights often incorporate special coatings or glazing that effectively block harmful UV rays. This not only prolongs the life of your interior but also maintains the aesthetic appeal of your home.

#5 Visible Damage

As you assess your skylight, pay close attention to any visible damage, such as cracks, chipped glass, or dents. These signs indicate that your skylight may be at the end of its lifespan and need to be replaced.

Minor damage may not seem like a big deal, but it can worsen over time and lead to more significant issues. While some minor issues can be repaired, extensive or recurring damage is often an unmistakable signal that it’s time for a skylight replacement.

This is because the longer you leave or ignore these issues, the more damage they will do in the future. Plus, a damaged skylight can significantly detract from your home’s curb appeal, diminishing the overall aesthetic charm.

Investing in a new skylight not only ensures that your home remains visually appealing but also maintains its functionality and structural integrity.

Types of Skylight You Can Choose For Your Replacement

Now that we’ve addressed the problems that can arise with aging or damaged skylights, it’s time to explore some solutions. Skylight replacement offers you the opportunity not only to resolve those issues but also to enhance your home in various ways. Let’s dive into some popular skylight options so you can make an informed decision when it’s time for an upgrade.

Fixed Skylights

Fixed skylights provide a continuous source of natural light without the ability to open or ventilate. They are perfect for brightening up rooms where ventilation is not a primary concern.

Ventilated Skylights

Ventilated skylights are designed for areas where fresh air and air flow are essential. They can be manually or electronically operated, allowing you to control the amount of ventilation in your space.

Tubular Skylights

Tubular skylights, or sun tunnels, efficiently channel natural light from the roof into your home, making them ideal for illuminating smaller spaces such as hallways, closets, or windowless bathrooms.

Division Kangaroof: Your Professional Skylight Installers

We hope this guide helps you better understand your skylights and their potential problems, allowing you to make decisions accordingly. If you think that your skylight is damaged and it’s time for replacement, don’t hesitate to connect with our team.

Division Kangaroof is a premier roofing company serving Gainesville and the surrounding areas of Georgia. We offer the best skylight replacement services in the area.

Contact us today at (706) 903-9301 to learn more about us and our services.

7 Quick And Effective Emergency Roof Repair Tips You Need to Know

When nature unleashes its fury in Gainesville, GA, your roof often bears the brunt of the damage. From thunderstorms to hurricanes, severe weather can damage different parts of your roof, and this will require your immediate attention.

But don’t fret, because today we’ll walk you through the essential steps of storm damage roof repair in Gainesville, GA.

With this blog post, you will be able to protect your home and make well-informed decisions in dire situations.

Step 1:  Assess The Damage

The first step in any emergency roof repair situation is to assess the extent of the damage. Identifying the problem is crucial in determining the appropriate course of action.

Light The Way:

To start, grab a reliable flashlight, preferably one with a strong beam. This will be your trusty companion as you assess the damage to your roof.

Safety First:

Before ascending any ladder or venturing onto your roof, prioritize safety. Ensure the area around your home is clear of obstacles, and if possible, have a family member or friend present for assistance and safety.

Inspect From Below: 

Begin your inspection from the safety of the ground. Look up at your roof, scanning it methodically for signs of trouble. Pay close attention to the following:

Damaged Or Missing Shingles: 

Scan for any shingles that may have been blown away or are visibly cracked, torn, or otherwise damaged.

Sagging Areas: 

Check for areas where the roof appears to sag or dip, as this can be an indication of structural damage.

Visible Leaks: 

Sometimes, leaks manifest as dark stains or wet spots on your ceiling. If you spot such signs inside, note their location for reference when you climb onto the roof.

By meticulously assessing the damage, you gain a clearer understanding of the scope of the problem. This knowledge is your first step toward a swift and effective emergency roof repair.

Step 2: Documenting The Damage

In the midst of assessing, patching, and securing during a roof repair, it’s easy to overlook one crucial step that can significantly impact the repair process – documenting the damage. This step isn’t just about keeping a record for your own peace of mind, it can be instrumental in ensuring a smooth and efficient repair process.

Remember, it’s always better to have more documentation than less. Take photographs from various angles and distances, capturing the details of the damage as comprehensively as possible. These records can provide peace of mind, expedite insurance claims, and assist roofing professionals in delivering the best possible repairs

Step 3:  Make Temporary Repair Solutions

Imagine this scenario: You’ve assessed your roof and home and found some danger signs, such as a pesky leak or a small hole that’s letting in unwelcome rainwater. Now, the responsible and safe thing to do is to call for a contractor. But until they’re able to arrive, the damage may get worse. In these cases, making temporary repairs yourself can be helpful, and provide you with a little relief until a more permanent solution can be arranged.

Now we know that you may not be a roofer yourself and have a little knowledge about emergency roof leak repairs. But don’t worry, here are a few things you can do.

If you want to patch a leak, make use of roofing cement or caulk. Apply it directly over the damaged area, spreading it evenly to create a watertight seal. Ensure that the patch extends beyond the damaged area to provide ample coverage.


Temporary Repair Solutions

Step 4: Clear Debris: Safeguarding Your Roof

After the storm has passed, the aftermath can leave your roof burdened with leaves, branches, and various debris from neighboring trees. In such a situation, it becomes imperative to clear this debris promptly. Neglecting it can lead to further harm to your roofing system. To tackle this task effectively, equip yourself with a roof rake or a broom with an extended handle. With these tools in hand, you can safely and efficiently remove the debris, ensuring your roof remains free from potential threats without putting yourself at risk of injury.

Step 5: Tarp It Up: Protecting Your Roof From Further Damage

When Mother Nature unleashes her fury and leaves your roof with significant damage, such as missing shingles or large holes, it’s crucial to act swiftly and provide a temporary barrier against the elements. Here’s a quick description of how to install a tarp and keep your home dry until permanent repairs can be made:

Gather Your Materials:

You’ll require a sturdy tarp large enough to cover the damaged area with some overlap. Additionally, gather roofing nails or heavy-duty duct tape and a ladder.

Safety First:

As always, prioritize safety. Ensure your ladder is secure and ask someone to help you in case you need assistance.

Position The Tarp:

Carefully position the tarp over the damaged area, making sure it extends beyond the damaged section to provide ample coverage. Use wooden boards or bricks to weigh down the edges of the tarp and prevent it from shifting in the wind.

Secure The Tarp:

Secure the tarp in place depending on your choice of material. You may want to use roofing nails to fasten the tarp to the roof’s edge or nearby shingles.

Step 6: Contact Your Homeowners Insurance

When your roof endures the brunt of storm damage, the aftermath can often result in extensive repairs or even a full replacement, which can be a costly endeavor. This is where your homeowner’s insurance comes into play as a crucial safety net for your financial well-being.

By assessing and documenting the damage that’s occurred, you’ll be able to file an insurance claim with your provider in order to help cover the cost of repairs or a replacement.

Also Read: The Role Of A Storm Damage Roof Inspection In The Insurance Claims Process


Homeowners Insurance

Step 7:  Hire A Professional Roofing Contractor

Calling in professional help is paramount during emergency roof repair. While temporary solutions can offer immediate relief, the expertise of a roofing contractor, especially a skilled roofing contractor in Georgia, is irreplaceable. These professionals possess a wealth of experience and knowledge, allowing them to assess the damage thoroughly.

Plus, working with local experts ensures you get tailored solutions that consider the region’s unique climate and building regulations. So, as soon as you detect a roofing problem, don’t hesitate to reach out to the professionals – it’s a step that can save you time, money, and countless headaches in the long run.

Division Kangaroof: Your Emergency Roof Repair Experts

In the face of roofing emergencies and the challenges they bring, remember that Division Kangaroof is your trusted partner for emergency roof repair. Our team understands the importance of swift and effective solutions when your roof is at risk.

From assessing damage to providing professional repairs, we’ve got you covered every step of the way. Your peace of mind and the safety of your home are our top priorities.

So if you feel that your roof requires our attention, be sure to call us at  (706) 903-9301.